![]()
OSSEC is a full platform to monitor and control your systems. It mixes together all the aspects of HIDS (host-based intrusion detection), log monitoring and SIM/SIEM together in a simple, powerful and open source solution.
File Integrity checking
There is one thing in common to any attack to your networks and computers: they change your systems in some way. The goal of file integrity checking (or FIM – file integrity monitoring) is to detect these changes and alert you when they happen. It can be an attack, or a misuse by an employee or even a typo by an admin, any file, directory or registry change will be alerted to you.
Log Monitoring
Your operating system wants to speak to you, but do you know how to listen? Every operating system, application, and device on your network generate logs (events) to let you know what is happening. OSSEC collects, analyzes and correlates these logs to let you know if something wrong is going on (attack, misuse, errors, etc). Do you want to know when an application is installed on your client box? Or when someone changes a rule in your firewall? By monitoring your logs, OSSEC will let you know of that.
Rootkit detection
Criminals (also known as hackers) want to hide their actions, but using rootkit detection you can be notified when they (or trojans, viruses, etc) change your system in this way.
Active response
Take immediate and automatic responses when something happens. Why wait for hours when you can alert your admin and block an attack right way?
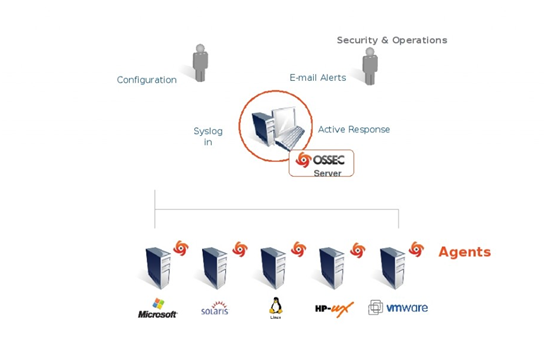
Working:
OSSEC is composed of multiple pieces. It has a central manager monitoring everything and receiving information from agents, syslog, databases and from agentless devices.
Manager
The manager is the central piece of the OSSEC deployment. It stores the file integrity checking databases, the logs, events and system auditing entries. All the rules, decoders and major configuration options are stored centrally in the manager, making easy to administer even a large number of agents.
Agents
The agent is a small program installed on the systems you desire to monitor. It will collect information on real time and forward to the manager for analysis and correlation. It has a very small memory and CPU footprint by default, not affecting with the system’s usage.
Agent security: It runs with a low privilege user (created during the installation) and inside a chroot jail isolated from the system. Most of the agent configuration is pushed from the manager, with just some of them are stored locally on each agent. In case these local options are changed, the manager will receive the information and will generate an alert.
Agentless
For systems that you can’t install an agent, OSSEC allows you to perform file integrity monitoring on them without the agent installed. It can be very useful to monitor firewalls, routers and even Unix systems where you are not allowed to install the agent.
INSTALLATION:
Download ossec-hids-2.7.tar.gz from http://www.ossec.net/main/downloads
#tar xzvf ossec-hids-2.7.tar.gz
#cd ossec-hids-2.7.tar.gz
#./install.sh
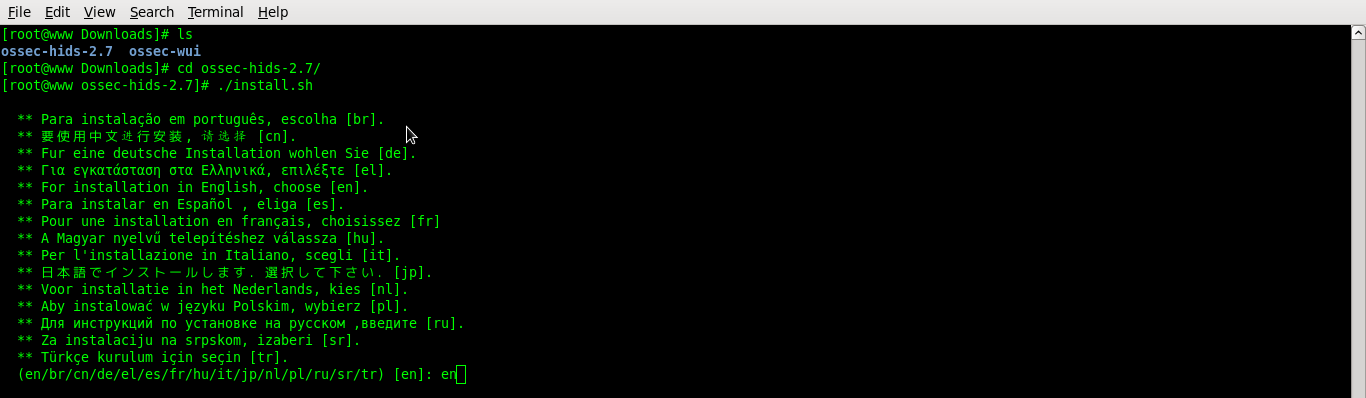
For English type : en
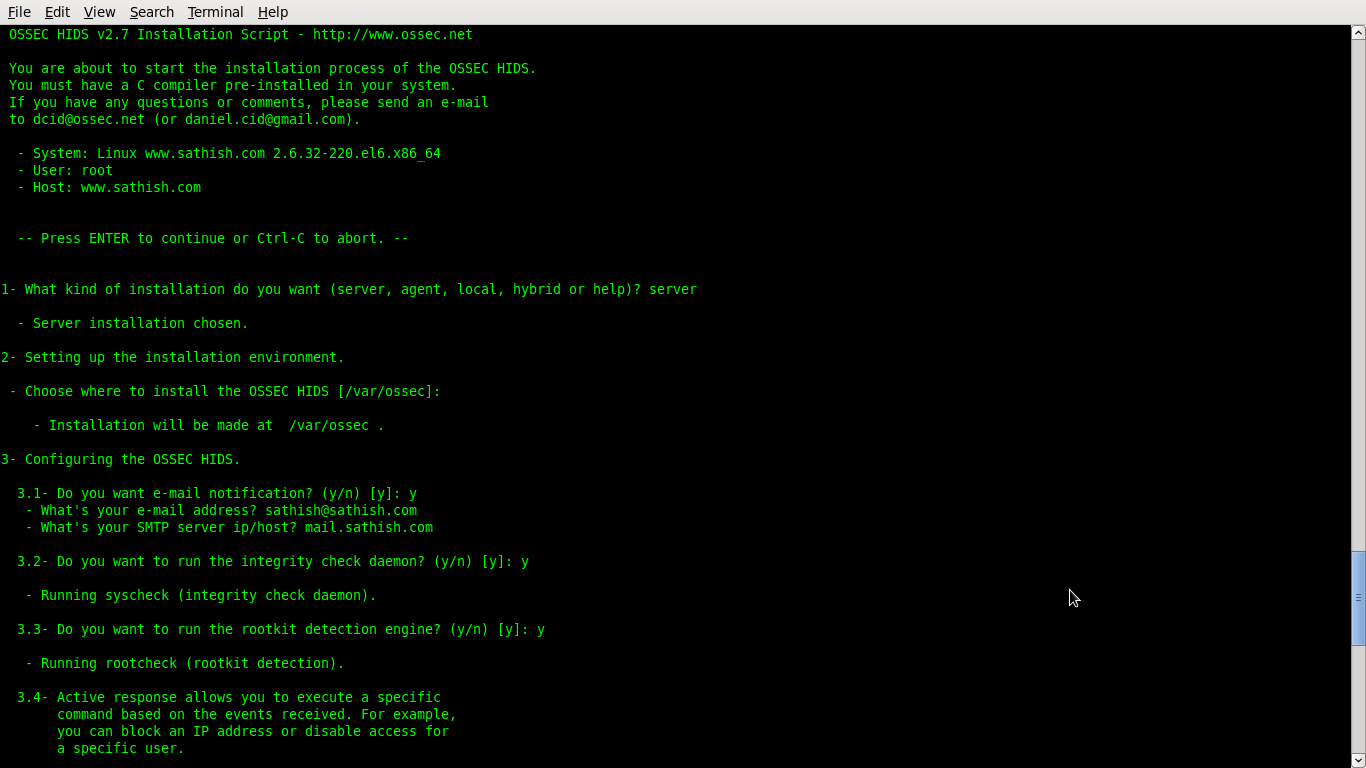
What kind of installation do you want (server,agent,local.hybrid): server
Choose wghere to install the OSSEC-HIDS [/var/ossec]: /var/ossec
Do you want email notification: y
what’s your email address: sathish@sathish.com
what’s your SMTP server ip/add: mail.sathish.com
Do you want to run the integrity check daemon: y
Do you want to run the rootkit detection engine: y
Do you want to enable active response: y
Do you want to enable remote syslog (port 514 udp): y
#/var/ossec/bin/ossec-control start
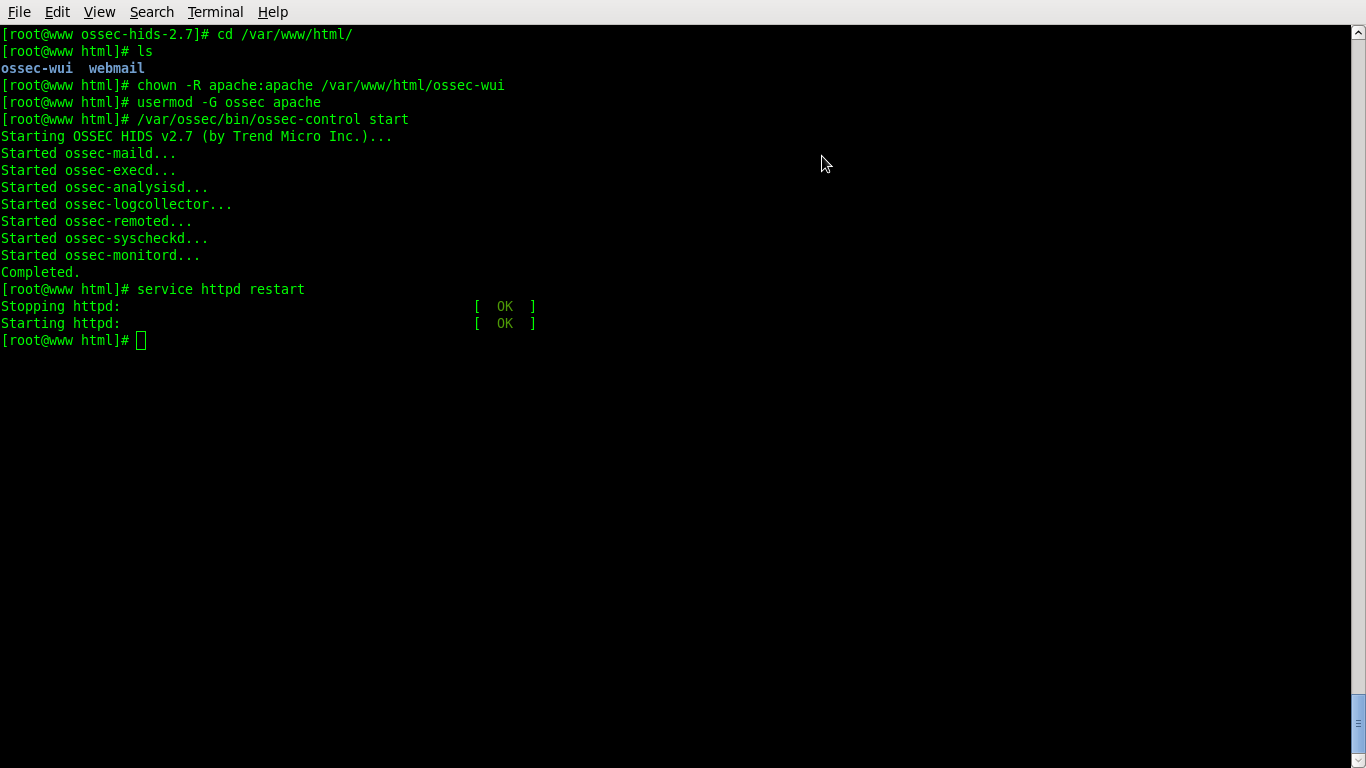
#cd /var/www/html
#wget http://www.ossec.net/files/ui/ossec-wui-0.3.tar.gz
#tar zxvf ossec-wui-*.tar.gz
#rm -f ossec-wui-*.tar.gz
#mv ossec-wui-* ossec-wui
#chown -R apache:apache /var/www/html/ossec-wui
#add apache user to ossec group
#usermod -G ossec apache
#/var/ossec/bin/ossec-control start
Configure apache to run at startup and start it
#chkconfig httpd on
#service httpd start
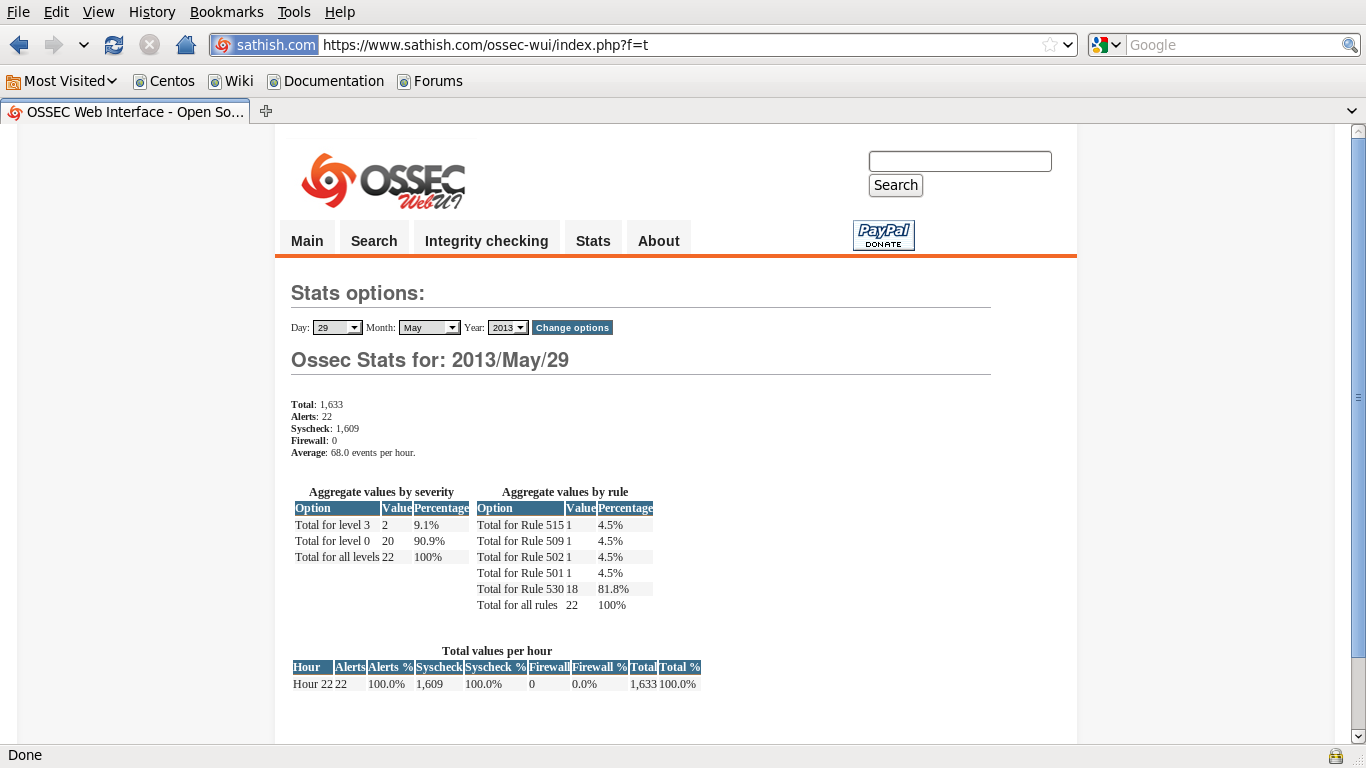
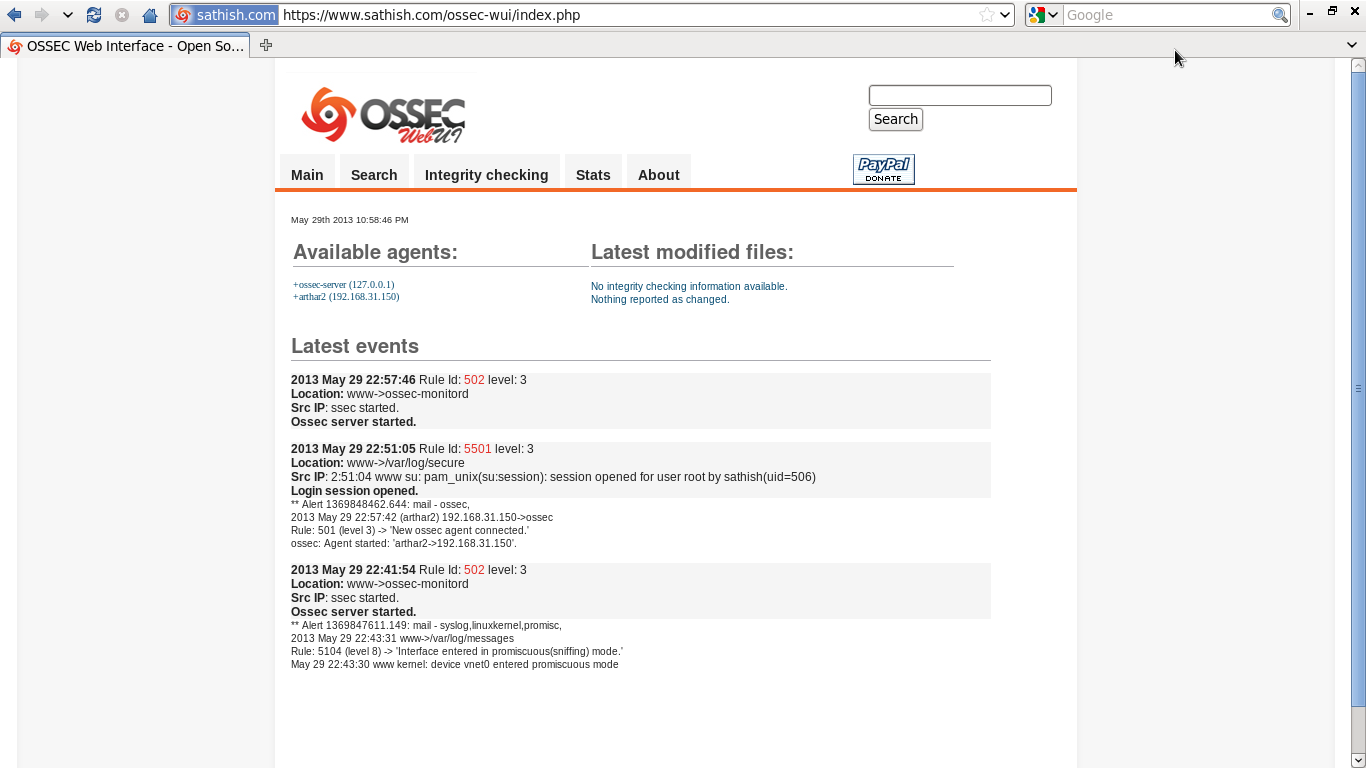
That’s it. Ossec server installation completed.now I can can browse to http://www.sathish.com/ossec-wui. The default user and password are: ossec/ossec.

Installing ossec agent (client in linux system)
Download ossec-hids-2.7.tar.gz from http://www.ossec.net/main/downloads
#tar xzvf ossec-hids-2.7.tar.gz
#cd ossec-hids-2.7.tar.gz
#./install.sh
For English type : en
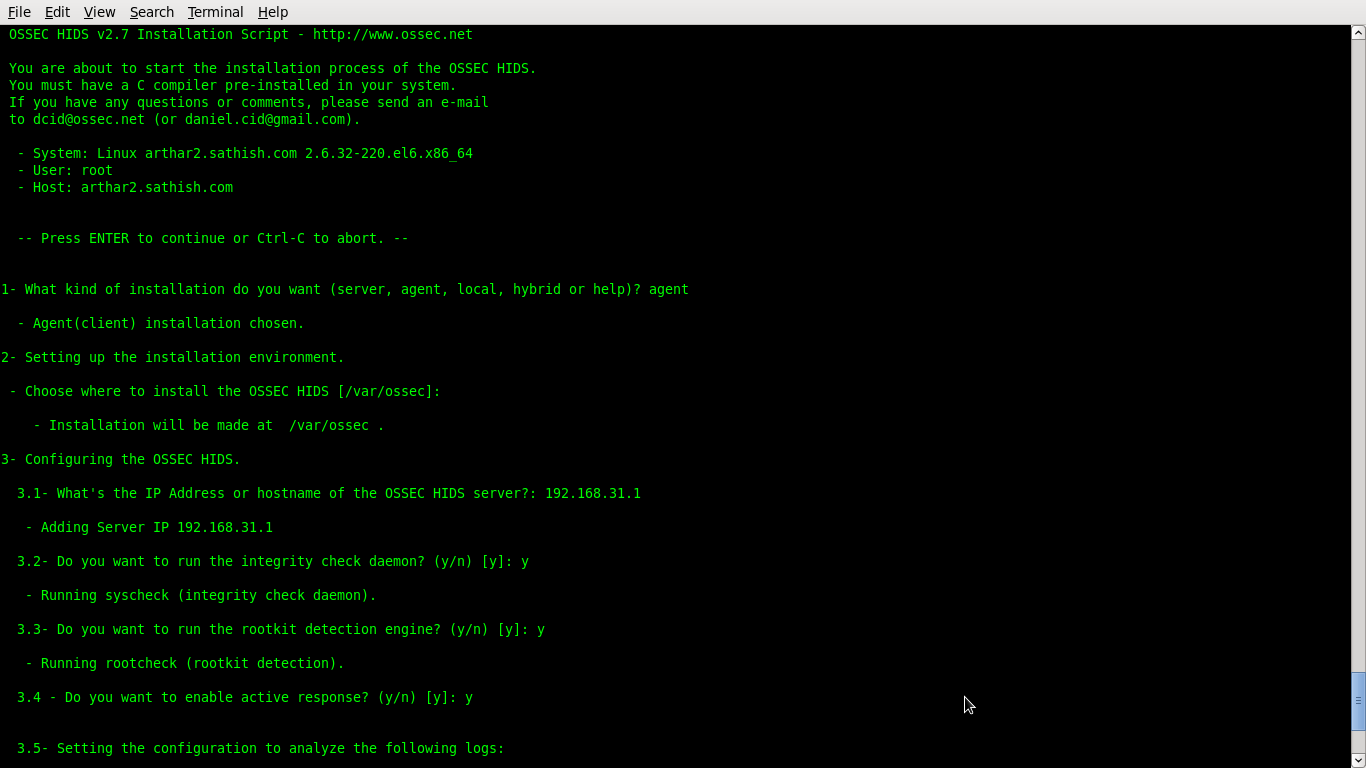
What kind of installation do you want (server,agent,local.hybrid): agent
Choose where to install the OSSEC-agent [/var/ossec]: /var/ossec
What’s the ip address of OSSEC-HIDS server: 192.168.31.1
Do you want to run the integrity check daemon: y
Do you want to run the rootkit detection engine: y
Do you want to enable active response: y
Do you want to enable remote syslog (port 514 udp): y
On the OSSEC server run manage_agents tool to add a new client
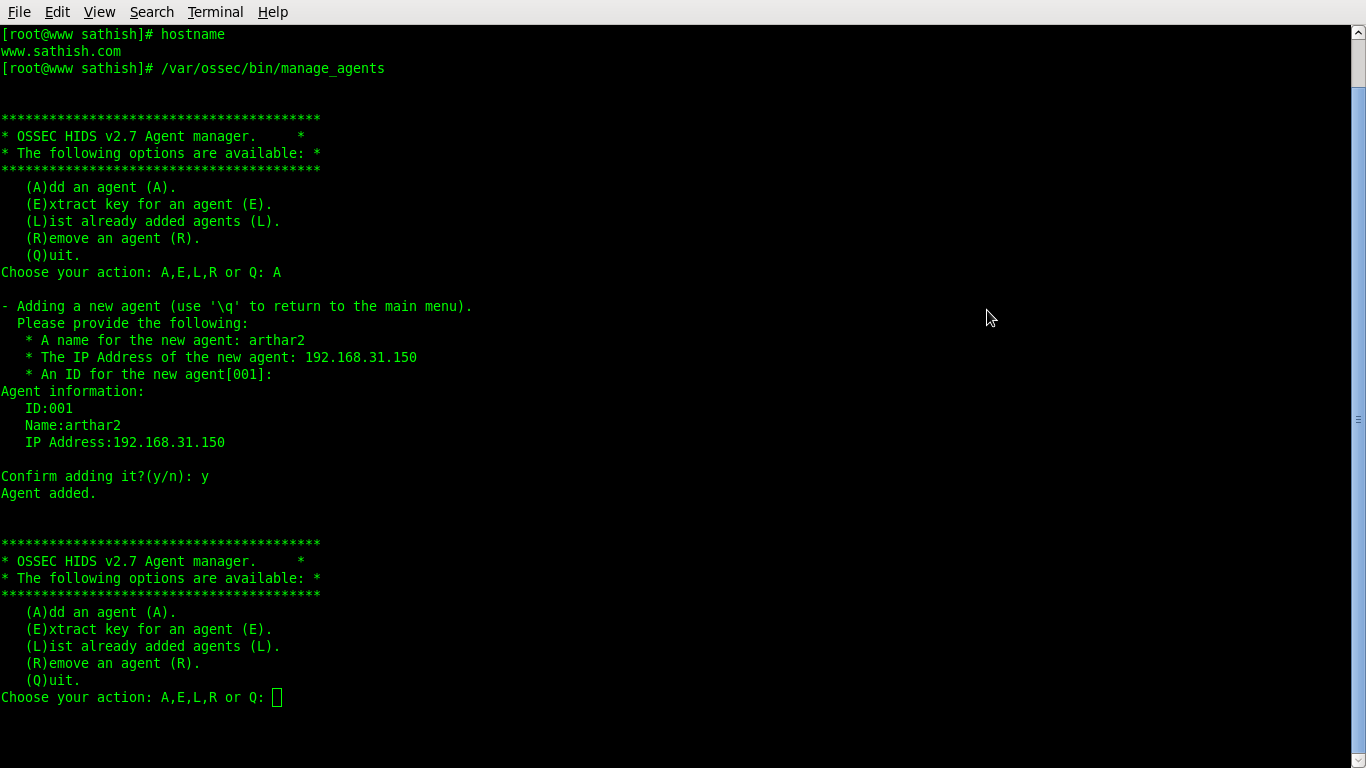
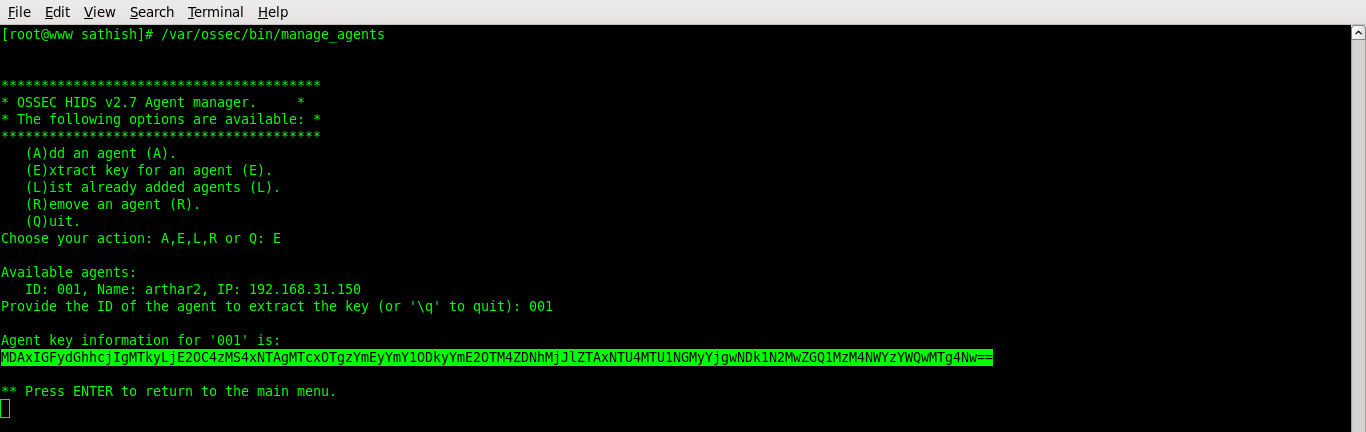
#/var/ossec/bin/manage_agents
Choose A to add an agent: A
provide a name for your new agent: arthar2
provide the IP of your new agent: 192.168.31.150
Provide an OSSEC ID for your new agent: 001
Confirm adding it?: y
Choose E to extract key for an agent: E
Provide the ID of the new agent: 001
Copy the agent key information
press ENTER to return to the main manu
Choose Q to quit
On the OSSEC client run manage_agent tool to configure the new client
#/var/ossec/bin/manage_client
Choose I to Import key from the server: I
Paster the the already copied agent ket: paste
confirm adding it: y
Press Enter to return to the main manu
Choose Q to Quit

Start OSSEC
#/var/ossec/bin/ossec-control start
That’s it. OSSEC client installation completed. Now i can browse to http://www.sathish.com/ossec and see messages from my new OSSEC client.
Installing ossec agent (client in windows system)
Download OSSEC windows agent from http://www.ossec.net/main/downloads
Run the downloaded exe file
A. Welcome to OSSEC HIDS Windows Agent v2.6 Setup Wizard – Click Next
B. License Agreement – Read the license agreement and if you agree click on I agree
C. Choose Components – If you are not running IIS, click to remove the mark on “Scan and monitor IIS logs” and click Next
D. Choose Install Location – Click Install
E. Completing the OSSEC HIDS Windows Agent v2.6 Setup Wizard – check that “Run OSSEC Agent Manager” is marked and click Finish
On the OSSEC server run manage_agents tool to add a new client
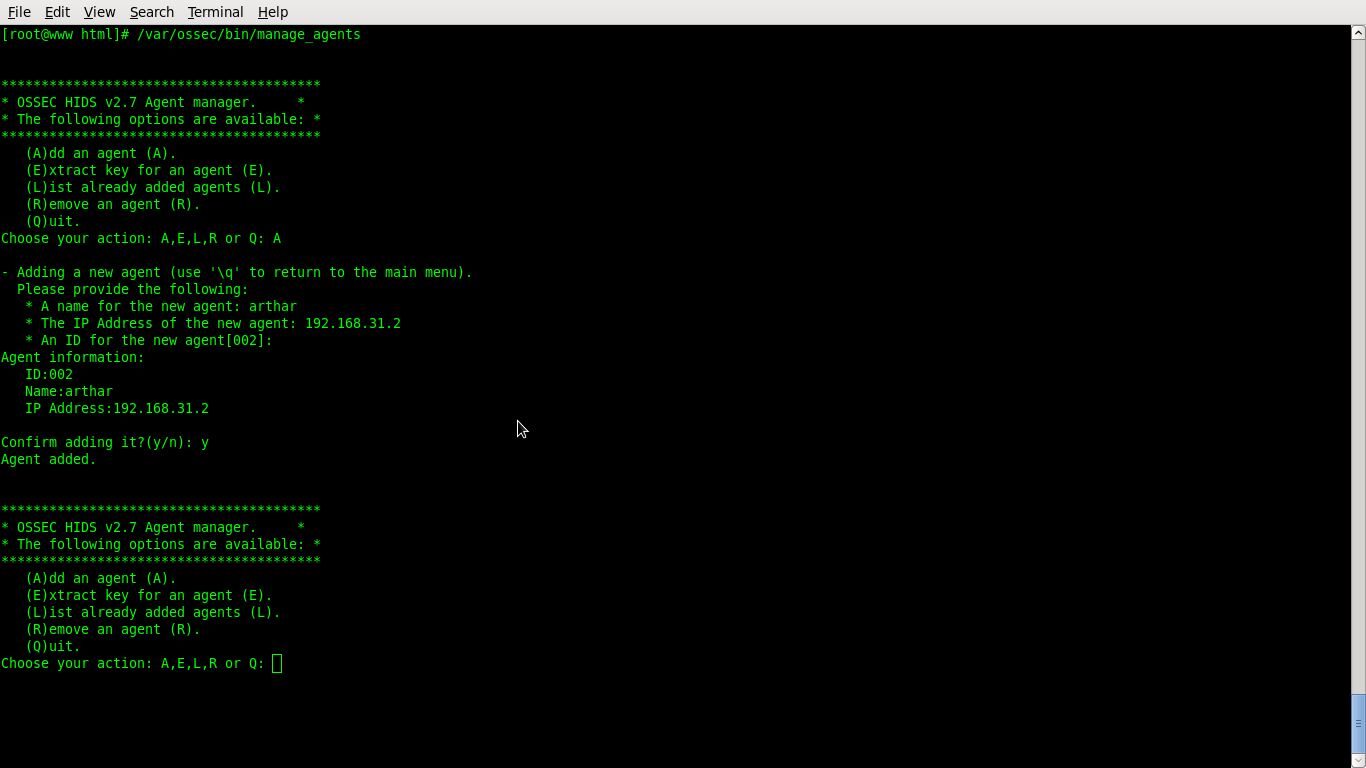
#/var/ossec/bin/manage_agents
Choose A to add an agent: A
provide a name for your new agent: arthar
provide the IP of your new agent: 192.168.31.2
Provide an OSSEC ID for your new agent: 002
Confirm adding it?: y
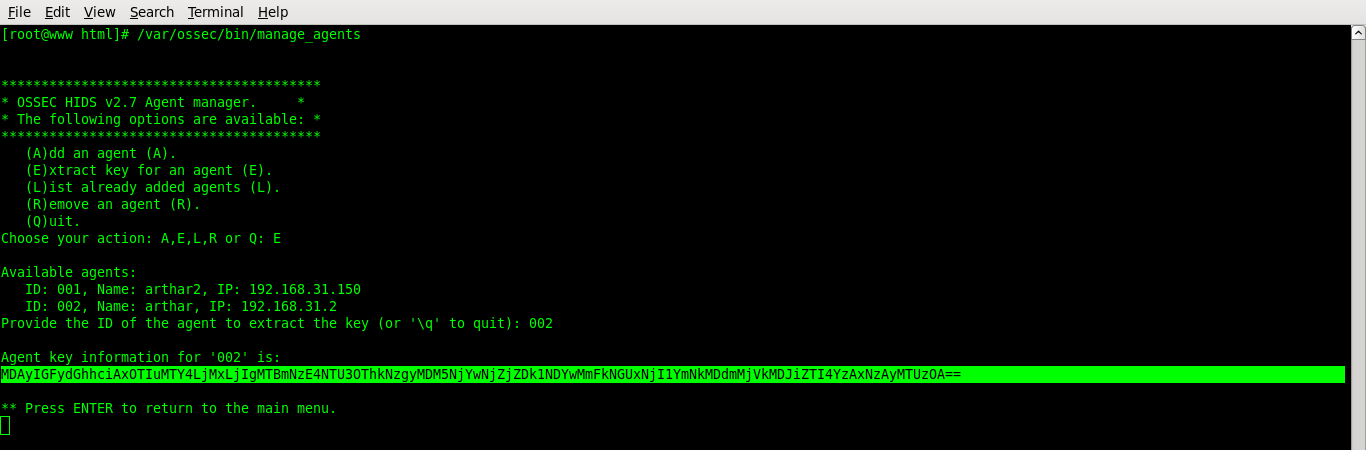
Choose E to extract key for an agent: E
Provide the ID of the new agent: 002
Copy the agent key information
press ENTER to return to the main manu
Choose Q -> Enter to quit
On the OSSEC windows client run manage_agent tool if it’s not already running and configure your new client installation
A. Start -> All Programs -> OSSEC -> Manage Agents
B. OSSEC Agent Manager – Fill my 192.168.31.1, and the “Authentication Key” that was copied from the server. Click save
C. Confirm Importing Key – Click OK
D. OSSEC Agent Manager – Click on Manage -> Start OSSEC
E. Close OSSEC Agent Manager
That’s it. OSSEC client installation completed. Now i can browse to http://www.sathish.com/ossec and see messages from my new OSSEC client.